Thursday, 24 December 2015

PASTA FUSILLI IN CREAMY CAPSICUM SAUCE


When it comes to pasta, am always a hater of the readily packed ones available at the local markets.My daughter,she is a huge fan of pasta and always pester me to get the ready made ones.So i started navigating and experimenting with new flavours which includes the italian as well as tried to indianise it to some extent.
This pasta fusilli in capsicum gravy gives you the lovely flavour of the capsicum.you wont get the raw taste .And ofcourse no one can judge that there is capsicum hidden in the gravy(obviously hideen but it is the main ingredient for that lovely sauce).
when i derived this new gravy for the pasta,i did not imagine how lovely and deliscious it would.So creamy and yet so healthy.
This sauce can be used for as a base for any pasta variety.here i have used the fusilli ones.
Surprise your pasta lovers at home with this creamy,buttery,cheesy recipe.


INGREDIENTS:

  • Pasta fusilli     -     2 cups
  • capsicum         -    1 small
  • onions             -     1 medium finely chopped
  • fresh cream     -     1/4th cup
  • grated cheese of your choice  -     1/4 th cup
  • italian seasoning  -  1 teaspoon
  • butter/olive oil              -      2 tablespoons
  • garlic                    -      4 cloves minced
  • pepper      -      half teaspoons
  • salt to taste
METHOD:
  1. heat olive oil/butter in a pan.
  2. add minced garlic and saute for 30 secs
  3. add onions and fry till golden.
  4. add chopped capsicum and saute till soft.
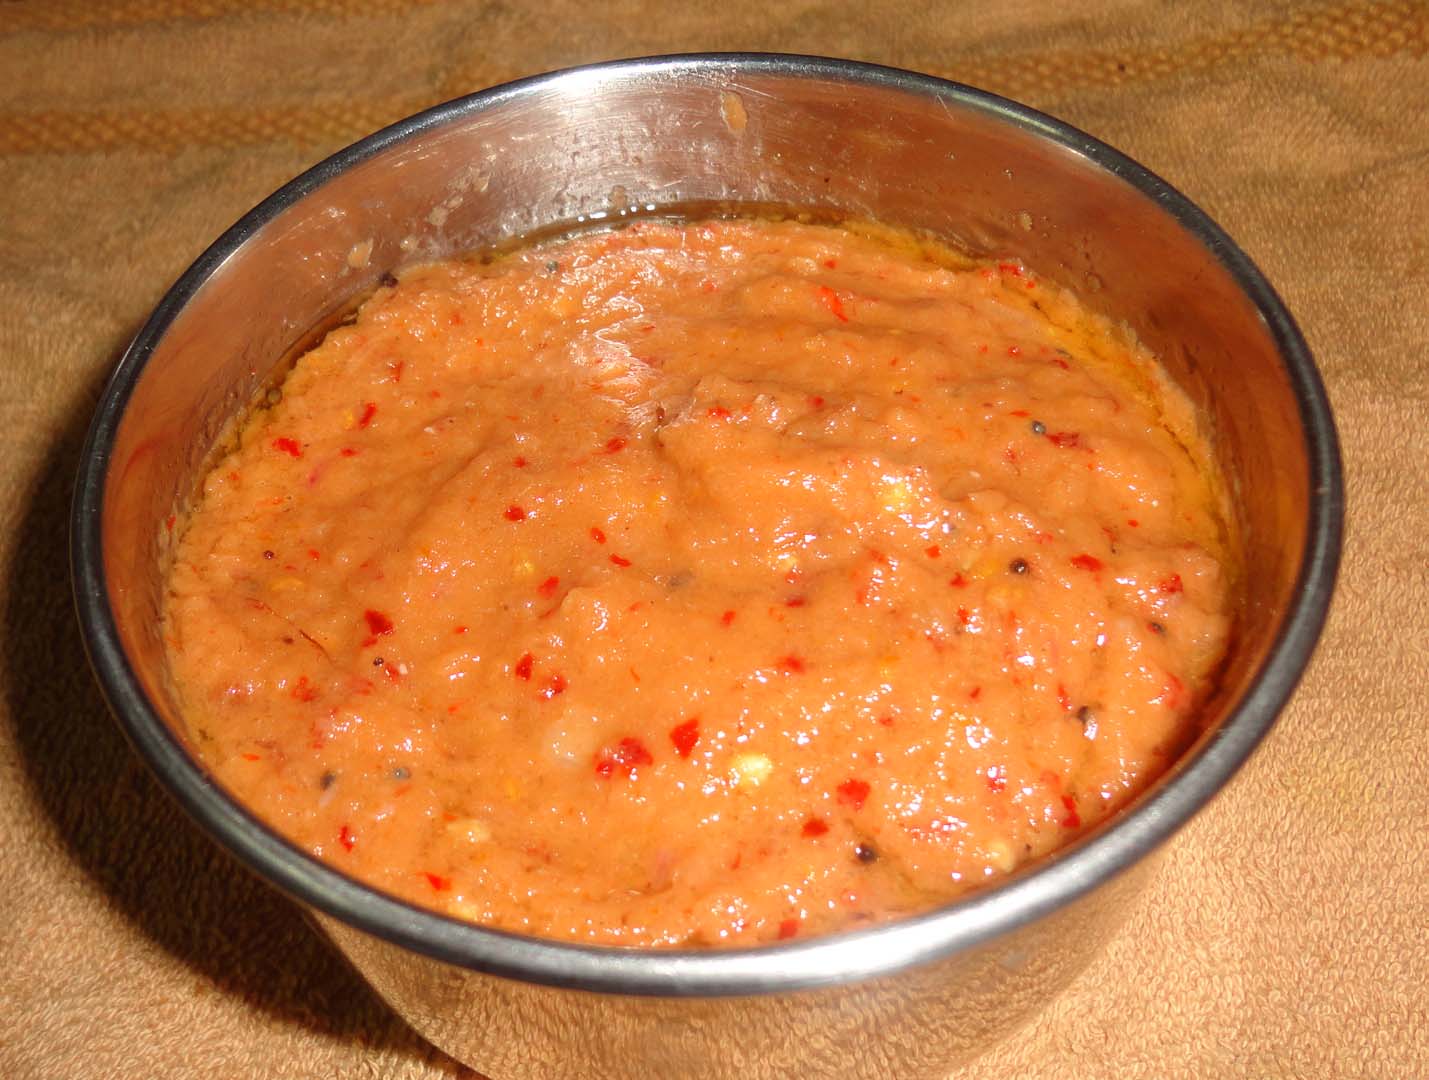
  5. let it cool.then grind it to a fine paste.
  6. add the fusilli to enough salted boiling water and cook till soft.Or follow the package instructions.
  7. drain and reserve the water used for boiling the pasta
  8. return the capsicum paste to the same tawa used to saute them.keep in low flame.
  9. add the cream ,pepper,salt,half of the cheese and seasoning and let it come to a boil.
  10. add the drained pasta and mix well.
  11. if the sauce is very thick you can add some of the reserved water to make it thin.
  12. now transfer to a serving bowl and top it with the reserved cheese and garnish with coriander.
cook's note:
  1. YOu can add little butter while boiling the pasta ,so that they dont stick to each other.
  2. you can even roast the capsicum over direct flame,peel the skin off and grind.It gives a good smokey tinge to your pasta base.But i find this method easy and equally flavourful.
  3. you can even add veggies of your choice and add them after tossing the onions and let them fry for few mins on medium flame till they are half cooked.

Monday, 21 December 2015

VEGETABLE STEW- KERELA STYLE


I always love to add coconut or coconut milk to my dishes.The coconut gives rich flavour and thickness to any of the gravies ,be it a vegetarian or a non vegetarian dish.When you fee that any of your gravies have become thin and runny, you can always add some thick coconut milk at the end and leave it to boil till it thickens.

This kerela style vegetable stew is rich and combines the flavours of the indian spices and coconut.
 this is so rich in flavour and goes very well with aapam,rotis,chapathis and also rice.The entire veggies are cooked in coconut milk.

Here you have to take two consistencies of coconut milk-Thick and thin.
The first coconut milk which u take will be thick and the second coconut milk will be thin.
So first you will be using the thin coconut milk(that is, the milk taken the second time)..And then use the thick coconut milk at the last.

How to make the coconut milk?

  1. Grate the coconut and let it sit in warm water for 10mins.(use 1/4th cup water for 1 cup of grated coconut).
  2. then grind the coconut along with little of the soaked water.
  3. now strain it and reserve the milk.This is the first and thick milk.
  4. next grind the strained coconut with rest of the water.
  5. Strain again.this is the second and thin milk.


INGREDIENTS:

  • onions       -         3 large finely chopped
  • carrots      -          1 large
  • potatoes   -          2
  • fresh green peas  -      1 cup
  • ginger       -          1/2 inch
  • garlic         -          4 cloves
  • cinnamon  -    1/2 inch stick
  • nutmeg powder  -   a pinch
  • fennel seeds   -     1 teaspoon
  • cardamom     -      2 nos
  • cloves           -       4
  • freshly ground black pepper   -   1 teaspoon
  • green chillies   -    3-4  slit lengthwise
  • grated coconut  -   2 cups
  • cashews           -    8 nos (optional)
  • butter            -       2 tablespoons
  • curry leaves  -   2 springs
  • coriander      -     for garnish
  • salt to taste.
  1. Crush the spices using a mortar and pestle(cinnamon,fennel,cloves,cardamom)
  2. Crush the ginger garlic .
  3. cut the vegetables into 1/2 an inch cubes.
  4. Take thick and thin coconut milk from the grated coconut.
  5. soak cashews in 1/4th cup warm water for 15 mins
  6. Heat the butter in a pan.
  7. splutter the crushed spices.add the nutmeg powder and freshly ground pepper.
  8. add the curry leaves and saute for 30 secs.
  9. Add the onions and fry till golden.
  10. Add the crushed ginger garlic.Saute till raw smell leaves.
  11. Add all the veggies and saute for a min.
  12. now pour the thin coconut milk .
  13. add salt and cover the lid and let the veggies cook till done.
  14. Meanwhile grind the cashews to a fine paste using the same water used to soak the nuts.
  15. mix this paste with the thick coocnut milk.
  16. open the lid and add the thick coconut milk and cashew mixture.let it boil for two minutes untill thickened.
  17. if u like the gravy to be thin ,then u can skip the cashew paste.
  18. switch off flame and garnish with coriander.
COOK'S NOTE:
  • the first milk you take from coconut will be thick milk,Save it for the last.the second milk from it would be the thin milk.
  • You can use veggies  of your choice like french beans,cauliflower,etc.
  • this gravy goes well with aappam,chapathis,rotis,phulkas and also rice.


Wednesday, 16 December 2015

Onion chutney


 There are times when you have coconut and still you feel lazy to grate and grind it.At that time there are few eay chutney recipes with me which comes in hand during the lazy hours.This is one such recipe and can be prepared in no time.It goes well with idlies and dosas.Adjust the red chillies according to your taste.


INGREDIENTS:


  • Red onions  - 5 big
  • Dry red chillies -10
  • Tamarind. -  gooseberry sized
  • Sugar.      -  1 tsp
  • Oil.    -     2 tbsp
  • Mustard seeds -  1 tsp


Method

  1. Soak red chilies for 10-15mins
  2. Peel n chop the onions roughly
  3. Heat a tablespoon of oil and fry the onions till golden.
  4. Squeeze the soaked chillies .
  5. Grind the onions,chillies,sugar and tamarind together along with required salt.
  6. Temper mustard seeds in a tablespoon oil and pour over the chutney 

Monday, 14 December 2015

MUTTON BRIYANI- (AMBUR STYLE)


This is one of my family's favorite recipes.this mutton biriyani tastes more of the Ambur style (A place called ambur in tamilnadu which is famous for their briyani).This place ambur is famous for their special briyani and people whoever travel via ambur will definitely stop there for their awesome taste.I have tried many briyani recipes and this one specially when i tried tasted more like the ambur type.Everyone at home enjoyed it thoroughly and the briyani was over within minutes.You can use chicken also in the palce of mutton but the cooking time drastically varied for chicken which i will give you in the cook's notes later.So , follow the instructions exactly to get the right consistency and taste.
  
 Here in my briyani recipe i usually grind some of the spices like cloves and cardamom ,as i dont like to bite them .so if u wish you can add the spices as whole.
 The soaked dry red chillies paste gives it the authentic flavour. .So never skip that step.


 INGREDIENTS:

  • Mutton     -    1kg
  • basmati rice - 4 cups
  • water           - 5 cups
  • onions     -     3 large
  • tomatoes  -    3 large
  • dry red chillis  -   6
  • ginger    -     1 inch piece
  • garlic    -      6 cloves
  • green chillies  -   3
  • coriander leaves -   1 cup (finely chopped)
  • mint leaves       -     1/2 cup (finely chopped)
  • lime juice         -     2 tablespoon
  • curd                  -     1/2 cup
  • star anise             -  1
  • javithri/maze        -   1
  • bay leaf                -   1
  • red chilli powder  -  1 teaspoon
  • turmeric powder   -   1/2 teaspoon
  • ghee                     -   4 tablespoons
  • oil                        -   2 tablespoons
  • salt to taste
TO GRIND (1):
  • Jeera     -         1 tablespoon
  • bay leaf  -        1
  • cinnamon  -   2 inch stick
  • cloves      -    4 
  • cardamom -  2.
TO GRIND (2):
     Grind together the ginger,garlic and green chillies.

TO GRIND (3):
     Soak the dry red chillies in 1/2 cup warm water for 15 mins.then squeeze the chillies and grind to a fine paste.


METHOD:
  1. Wash and soak the basmati rice for 30mins
  2. Meanwhile heat the oil and ghee in a pressure cooker and temper the bayleaf,star anise and the maze.Now add the powdered spices.
  3. Add the onions and fry till golden.
  4. now add the ginger garlic chilli paste and fry till raw smell leaves.
  5. Add the washed mutton pieces and fry till it changes colour.
  6. add the tomatoes and fry till it becomes mushy.
  7. now add the coriander and mint leaves and saute for a minute.
  8. Add the curd and again saute for a minute.
  9. add the lime juice.
  10. Next add the red chilli powder and turmeric powder and red chilli paste and saute for a minute.
  11. Add the required salt.
  12. Close the lid and put on the weight.(The onions,mutton and tomatoes will leave sufficient water.If not add half a cup of water .not more than that)
  13. Let it cook for 10 to 12 whistles.The muttton should be cooked well.it depends upon the meat.For me it took 12 whistles to cook.You can check after the 8th whistle.if cooked properly then you can proceed with the next step.
  14. Let the pressure reduces and then open the lid.
  15. transfer the mutton pieces separately and measure the liquid left.This should be measured accordingly for cooking the rice.For example, if you are left with 2 cups of liquid  from cooking the mutton then You should only add 3 cups of water for the rice.
  16. now add the soaked rice to the same pressure cooker and add the mutton pieces.Now measure the liquid and water and ass it to the pressure cooker.Check for salt and add extra if required.
  17. Close and put the weight.
  18. let it simmer for 20mis.
  19. Open when pressure leaves and mix carefully so as not to break the rice.
  20. garnish with coriander and serve with boiled eggs and ONION RAITHA.


COOK'S NOTE:

  1. you can use chicken instead of mutton,but make sure to reduce the cooking time.for chicken 3 to 5 whistles will be sufficient.
  2. you can also make this briyani using dum process.dumming process i have explained in my CHICKEN DUM BRIYANI.
  3. You can also opt to use the spices as whole instead of  grindind.Personally i dont like the bite of cloves or cardamom,so i have ground them.
  4. Never skip the dried red chilli paste.It gives the briyani its authentic taste.


Monday, 30 November 2015

CHICKEN DUM BRIYANI


Briyani is something which is loved by all.At my home, we make sure atleast we take biriyani  once in a fortnight.I have failed many a times at attempting to make briyani.None of our sundays are complete without non-veg.So this sunday my kids wanted to have chicken briyani.You need to find that perfect method and recipe that works for you.i battled to get a proper briyani countless times and this one worked well for me.You all will be familiar with the biriyani which we get in shops and their aroma is just divine.You can prepare the biriyani with the same aroma at home, which is even more healthier.My kids just love biriyani served with hard boiled eggs and onion raitha.And for making the dum briyani, you need not have all those sophisticated big barrels at home.I will give you the easiest method of keeping the dum at home.Usually dum briyani is something where the rice and gravy is prepared separately and mixed or layered and then kept over medium flame and covered with aluminium foil or dough and then burning coal is placed on top of them.This coal gives that divine smoky flavour for the dumming process.You can opt for the coal method also which i have mentioned how to do it below in the instructions.


Ingredients:
  • Chicken. -  1 kg
  • Basmati Rice.       _   4 cups (750gms)
  • Onions.   -      4 large
  • Tomatoes. -  3 large
  • Ginger.     -     2 inch piece
  • Garlic.    -    5 cloves
  • Green chillies. -   4
  • Cardamom.   -    2
  • Cloves - 4
  • Javithri/maze. -  2
  • Star anise. - 1
  • Jeera.  -  2 teaspoons
  • Bayleaf. -  2
  • Turmeric powder. -  1 teaspoon
  • Red chilli powder. -  2 teaspoons
  • Mint leaves. -   1 cup finely chopped
  • Coriander leaves. -  1 cup finely chopped
  • Lemon juice.  -  2 tablespoons
  • Curd.   -    4 tablespoons
  • Ghee. -   4 tablespoons
  • Oil. -   4 tablespoons
  • salt to taste


Method:
1.Wash and soak basmati rice for half an hour.
2.grind together cardamom,cloves,jeera and 1 bayleaf to coarse powder.(if u want you can add them as whole..I don't like to get the bite of cardamom or cloves in my briyani.so I grinded them)
3.grind together ginger garlic and green chillies to a fine paste.
4.heat enough water for the rice in a vessel and let it boil.(the rice should be immersed well in the water.so add accordingly).add 1 tablespoon of ghee in the water.(this makes sure that the rice are separate when done).
5.let the rice cook half the way through.it should still have that crunch when you bite.when done drain the rice and keep aside.
6.heat the oil and 3 tablespoons of ghee in a pressure cooker.
7.temper the bayleaf, javithiri,star anise and the ground spice powders.
8.add onions and saute till golden brown.
9.Add the ginger garlic chilli paste and saute till raw smell leaves.
8.add the washed chicken pieces and saute till they turn slightly light in colour.
add the tomatoes and saute till mushy.
9.add the chilli and turmeric powders and saute for a min.
10.add the lemon juice and curd and mix well.
11..now add the mint and coriander leaves and fry for a min.
12.Add the required salt.mix well
13.Close the lid with the weight on.(need not add water as  the onions,tomatoes and chicken leaves enough water by now.if u feel there is no sufficient water ,add a little so that the water level is just covering the chicken.)
14.leave it till 3 whistles.
15.transfer the chicken gravy to another vessel.
i have made this kids friendly as it is less spicy.if you want you can add two teaspoons extra of red chilli powder.

FOR THE DUM PROCESS:
  •  heat a iron tawa (like the traditional dosa tawa) over a medium flame.
  • start layering the pressure cooker used for cooking chicken with chicken gravy and rice alternatively.The layers should be starting and ending with the chicken gravy.
  • keep the cooker over the tawa.cover with a flat thick steel plate.
  • place a vessel of boiling water on top of the lid over the pressure cooker.
  • leave on the dum for 20 mins.
  • open and stir the mix carefully so as not to break the rice and the chicken.
  • garnish with coriander.
  • serve with onion raitha and hard boiled eggs.
  • you can check my recipe for onion raitha HERE
Cook's note:
  1. Always make sure that the rice is only half cooked.it should have that crunch when layered.
  2. for dum for process, you can alternatively add coal on top of the lid instead a vessel of boiling water.the option is yours.coal gives immense flavour for dum briyani.
  3. you can always add extra colour if u want to have that red look for you briyani.i havent used any colour here .
  4. you can sprinkle some red colour over the cooked rice and mix lightly to get that characteristic red rice you see here and there in the store bought briyani.


SIMPLE ONION RAITHA


 Well this dish onion raitha goes almost with anything.the crunch of the raw onions and the salted curd blends so well.no briyani or variety rice is complete without raitha.It is so easy to make and so delicious.if you are bored to make any sidedish for rotis or chappatis, this simple onion raitha can be done to make things simpler .


INGREDIENTS:

  • onions    -    3 finely chopped
  • green chilli -   1 finely chopped
  • curd           -    1 1/2 cups
  • salt to taste
METHOD:
1.Mix all the ingredients well together with little salt.garnish with coriander.

how easier it can get??

cook's note:
  • this raitha can be served for briyani,rotis and parathas
  • for variations you can add little grated carrots/grated cucumber/finely chopped tomatoes or you can add all.Choice is yours.

Tuesday, 24 November 2015

SIMPLE DOUBLE BEAN JEERA RICE


                           .There was this vegetable vendor who comes to my street every day with really really fresh veggies.But since am at 1st floor in my apartment before i could run down after hearing his voive, he would go to the other street.MY kids they neva let me anywhere alone .So if i had to catch a street vendor i had to get them ready as well to go outside.So this day they were sleeping and by the time i heard the vegetable vendor's voice selling Double BEans.I love this healthy seed and wanted to get it right away.So i ran down and got some fresh double beans.And i did mention to the vendor to wait for few mins everyday for me to come pick up veggies from him.So i got fresh beans from which i had to peel the skin to remove the seeds from within.Already i had plans for making jeera rice for lunch and then thought why not give a try with the double bean in the jeera rice.It turned out so well that i couldnt keep the recipe within myself without sharing it.SUCH AN HEALTHY FOOD FOR THE KIDS...my kids enjoyed it. This is such an easy recipe that you can make in no time.this can be given to kids to school and i bet there wont be any leftovers in the lunch box.
So here goes the recipe..


INGREDIENTS:

  • basmati/raw white rice      -              2 cups
  • onions                                -              4 large
  • double beans                      -              2 cups
  • jeera/cumin                                -             3 teaspoons
  • green chillies                     -             2 large slit
  • cinnamon                           -            1 inch stick
  • cardamom                         -              3
  • javithri/mace                     -            2
  • star anise                           -             1
  • oil                                      -             4 tablespoons
  • ghee                                  -             2 tablespoons
  • water                                 -             3 cups for basmati/4 cups for raw rice
METHOD:

  • Wash and soak the rice for 30mins.
  • chop the onions lengthwise .
  • slit the green chillies.
  • heat oil in a pressure cooker and temper all the spices
  • add the onions and fry till golden
  • add the green chillies and double bean and saute for a min.
  • then add the drained rice and saute for a min.
  • add the required water and salt to taste.
  • close lid and cook for 3 whistles on medium flame or cook for 20mins on low flame,


Saturday, 21 November 2015

CAPSICUM IN CURD CURRY


                                        CAPSICUM IN CURD GRAVY


                          This capsicum and curd gravy is so simple to make..yes all my recipes are tried and tested and i give you my best and easiest form of making all the dishes.This is one such dish which you can make within few minutes.Goes well with rotis and also rice.the sweetness of capsicum and onions and the sourness of the curd takes its flavour to a all new different level of taste.This dish is one of my family's favourites .And am happy to make it when am all tired to make a gravy and this one comes in hand for me .ENJOY


INGREDIENTS:

  • capsicum                  -              1  large finely chopped
  • onions                      -               3 finely chopped
  • tomatoes                   -              3 finely chopped
  • curd                          -              1 cup
  • turmeric powder      -              1/2 teaspoon
  • chilli powder           -              1 1/2  teaspoons
  • coriander powder     -             1   1/2 teaspoons
  • jeera/cumin seeds    -             2 teaspoons
  • fennel seeds/sombu -             1 teaspoons
  • oil                            -              2 tablespoons


METHOD:

  1. Heat the oil in a pan.Add jeera and fennel seeds.let it splutter
  2. add onions and saute till golden brown.
  3. add tomatoes and saute till mushy.
  4. add all the spice powders and fry for a minute
  5. now add the chopped capsicum and mix well.
  6. Add the curd and sallt and mix till combined.
  7. close the lid and cook till the gravy reduces and capsicum becomes soft.
  8. garnish with coriander.
  9. serve with hot rice,rotis,phulkas.


SHAHI CHICKEN KORMA


                                                      SHAHI CHICKEN KORMA


     Well its raining outside and my hubby and kids needed something hot and yet less spicy to heat up their body and mind for lunch.So i wanted to make something with chicken that can go well with rotis and rice.I made this shahi chicken korma which blends well with anything.It is a very very rich korma which has almonds and cashews mixed in the gravy which gives it the distinct flavour and thickness unlike other types of korma.
 
               Usually the masala ingredients are ground separately and added while cooking. This is the easiest tried recipe of shahi chiken korma..i had modified the recipe as such so that you need not take so much pain in grinding ingredients separately including the ginger garlic as in other dishes where we need ginger garlic paste.the flavour is intense if u marinate the chicken pieces in the masala for an hour..if you are in a hurry then u can skip this step as well.. I tried both the versions ..not marinating the chicken also gave the desired taste of shahi korma.

                  you can prefer it to be either yellow in colour or whitish. i prefer yellow gravy so added turmeric and very little red chilli powder.If you wish to prefer it white you can very well skip the turmeric and chilli powders and add extra green chillies instead.So its already weekend..why waititng ,try your version and leave in your comments.ENJOY


INGREDIENTS 1:

FOR THE MASALA:

A)TO BE DRY ROASTED:

  • Onions                     -                      2
  • almonds                  -                       1/2 cup
  • cashews                  -                       1/2 cup
  • poppy seeds           -                        3 teaspoons
  • grated coconut       -                        1/2 cup
B)OTHER :
  • Ginger                  -                     1 inch piece
  • Garlic                   -                      6 pods
  • plain yogurt         -                      2 cups
  • red chilli powder  -                     1/2 teaspoon
  • turmeric powder  -                     1/4 teaspoon
  • garam masala powder    -           1 teaspoon
  • lemon  juice of        -                    2  lemons
  • coriander leaves       -                  1/2 cup chopped
  • mint leaves(optional) -                1/4 cup
INGREDIENTS 2:

  • Chicken                   -               1 kg
  • Cinnamon                -              1 medium stick
  • cardamom               -               4
  • cloves                      -               4
  • black pepper corns   -             8
  • fennel seeds             -              2 teaspoons
  • green chillies            -              4 large slit
  • oil                             -             1/4 cup
  • salt to taste
METHOD:

  1. Dry roast each of the ingredients given in the masala A separately.Roast them till they turn light brown.
  2. now Add the rest of the ingredients given in the masala B along with the cooled A ingredients.grind them to a fine paste using curd.add all of the curd to make the paste.Add the slit green chillies with the masala.(do not grind the chillies)
  3. Wash the chicken thoroughly and mix with the ground masala.let it marinate for an hour.
  4. After an hour, heat oil in a pressure cooker.Add the whole spices and let it splutter.
  5. Add the masala along with the chicken.
  6. Add required salt. Mix well.
  7. close the lid  with the weight.
  8. simmer it for 10 mins.you should not get whistle for the first 10mins while it is simmering.
  9. After 10 mins keep the flame to medium and cook for 3-4 whistles.
  10. Switch off flame and wait till the pressure reduces.
  11. open the lid and let it boil till the gravy thickens.
  12. garnish with coriander .
  13. can be served with rice,rotis, parottas.
COOK'S NOTE:
  • If u are in a hurry and dont have time to marinate the chicken , then u can directly start with the cooking procedure.
  • Always poke the chicken pieces with a fork for the masala to get into the chicken.
  • if you wish the korma to be white avoid the turmeric and chilli powders and add extra green chillies.for this recipe you can add 6 to 8 green chillies.
  • always soak the nuts for half an hour if you have time so that they grind to a fine and smooth paste.


Tuesday, 17 November 2015

BADAM HALWA


When i hear the word badam halwa ,i go salivating.Yes it is the richest of the halwas, as we use pure almond paste and ghee.Ofcourse this recipe is NOT FOR WEIGHT WATCHERS.the more u add the ghee the more tastier it becomes..always try to use homemade ghee which gives the best flavour for your dishes especially the sweets.This recipe is so easy to make and as u go through my recipe u will be relieved at how easily it can be prepared at home.Then why you spend so much on store bought ones when u can prepared the most delicious and healthy badam halwa at home?hurry up and prepare for the recipe...

INGREDIENTS:

  • badam                    -                    1 cup (soaked overnight and blanched)
  • sugar                      -                    1 cup
  • water                      -                    1/2 cup
  • milk                        -                    1 cup
  • ghee                       -                    1/2 cup
  • kesar                      -                    few strands(optional)
  • Yellow food color  -                  2-3 drops(optional)       
METHOD:
  1. soak the badam overnight and peel off the skin
  2. Grind the peeled badam into a fine paste using half of the milk.
  3. soak the kesar strands in the rest of the milk.
  4. meanwhile add the sugar and water .stir at low flame till the sugar dissolves.
  5. Add the almond paste and the kesar milk into the sugar syrup.
  6. stir till combined
  7. Add the food color if desired.

8.keep the flame at low the entire process.

9.slowly the mixture starts to thicken.

10.STart adding the ghee slowly a tablespoon at a time and mix well till combined.U can check out my homemade ghee recipe here.

11.when the entire ghee is incorporated well , the halwa starts leaving the sides of the pan.
12.keep stirring till it is thickened and bubbles starts appearing.
13.switch off the flame and pour the halwa in a well greased tray.


14.dont worry ,the halwa thickens with time.


COOK'S NOTE:

  • If u want a thicker halwa then u can reduce the amount of milk to 3/4th cup.
  • u can serve the halwa cold or warm.
  • can microwave it for 15-20 secs on high power before serving .
  • when served cold it will be slightly thicker than when served warm as the ghee hardens when chilled.

CEYLON MUTTON PAROTTA


I always loved this mutton paratta in most of the restaurants we visit in chennai.this specially made stuffed paratta is so soft and the filling takes the majority part of the dish.the flavour of the egg and the meat together gives the intense flavour for this paratta.i always wanted to try this at home and finally on one fine day when my kids left me alone(i mean it..2 naughty kids at home and they completley engage me the entire day), i wanted to try my hands on this.
to make the perfectly cooked paratta u gotta roll the dough paper thin so that u could see through it.
if not rolled this thin then the inside of the paratta wont be cooked properly.So put in all ur effort into rolling it into paper thin.
this can be achieved only if u give the dough its resting time.during this time the dough attains its elasticity and gives u that perfect consistency to stretch n stretch and stretch.(ofcourse this is not an easy man's job..So be patient while making this paratta.And do not prepare it while u are in a hurry.(TRUST ME, ITS ALL WORTH THAT PAIN AND EFFORT U PUT IN).
The paratta also takes quite sometime to cook properly on the stove top.always keep the flame at low and let the paratta brown.increasing the flame burns the paratta on the outside while keeping the dough raw on the inside.So finally here's the recipe for the yummiest ceylon mutton paratta.ENJOY


INGREDIENTS:

  • All purpose flour/ Maida                   -                    3 cups
  • egg                                                     -                     2 large
  • salt                                                     -                     1/4 teaspoon
  • melted vegetable fat/butter                -                     1 tablespoon
  • milk                                                   -                      1 cup.
  • ghee                                                   -                      to shallow fry the parottas

METHOD:
  1. take the flour in a mixing bowl and add  salt to it.mix well
  2. lightly beat the  1 egg and add the milk to the egg.mix to blend
  3. make a well in the center and add half of the milk egg mixture.knead well.
  4. keep adding the liquid untill the dough becomes pliable.
  5. keep kneading untill the dough becomes soft and non-sticky.
  6. the dough should be non-sticky.if it is sticky add little flour and if it hard to knead add little more milk.
  7. cover the dough with wet cloth and leave aside for 2hrs.
  8. meanwhile prepare the filling.
  9. You can use my chettinad mutton curry recipe from here  for the filling.once u attain the gravy stage of the mutton gravy keep stirring till it becomes a bit dry.then u can use this to fill the parottas.
  10. After two hours, remove the cloth and knead the dough again for 5mins.divide it into equal sized balls.
  11. now flour the working surface and start rollling the dough with the rolling pin.


12.the dough should be really thin (paper thin) after rolling


13.now slightly beat the another egg and using a pastry brush, apply a generous coating over the rolled dough.the rolled dough should be somewhat square shaped.


14.place two tablespoons full of the filling generously .

15.start folding the dough from the left side towards the center so as to cover half of the filling

16.next bring the right side of the dough and overlap on the left fold.lightly brush with egg.

17.then bring the top end towards the center and again bring the bottom end towards the center and overlap the top fold.now u will be having a stuffed dough in a square shape.

18.apply beaten egg generously on all sides.


19.heat a tawa.add little ghee.i always use freshly prepared homemade ghee.u can check my recipe for homemade ghee here
20.place the side of the parotta on which u have applied the egg
21.now the other side will be on top .apply the egg generously on this side also and sprinkle little ghee.let it cook for few mins on low flame.

22.Now flip it over and cook for few more mins.It should have become golden brown by now.

23.if your sides are not cooked properly, use two flat ladles like shown in the picture below to hold the parottas upright.now cook on all the sides with the two ladles and holding the parotta upright on all the sides.


24.Alternatively u can bake the parottas  in a preheated oven at 180 degree celcius for 20 minutes.bake for 10mins on one side and flip the parottas and bake for another 10mins.

25.Serve with tomato ketchup and raitha 


Wednesday, 11 November 2015

PUNJABI EGG CURRY


                              Well, it is raining here and i was craving for some hot and spicy gravy to go with my dinner.And my husband is a big fan of eggs.So i had lots of eggs in my fridge.So thought why not make some spicy egg curry with rotis and rice.So wanted to surprise my hungry hubby as he returned from his tiresome office.This is a slightly spicy curry as we are adding green chillies and red chilli powder.If YOu want a less spicy gravy , u can always go ahead and omit the green chillies.


INGREDIENTS:

  • eggs                     -                4  (boiled)
  • onion                   -                1 finely chopped
  • oil                       -                 2 tablespoons
  • bay leaf               -                1
  • cumin seeds         -                2 teaspoons
  • red chilli powder  -               1 1/2 teaspoons
  • coriander powder  -               2 teaspoons
  • turmeric powder   -               1/2 teaspoon
  • salt                        -               to taste
  • kasoori methi       -               1 tablespoon
  • garam masala       -                1 teaspoon
  • water                    -                 3/4 th cup
to grind:
  • onion                  -               2 large
  • green chilli        -                2
  • ginger                -                1 inch piece
  •  garlic                -                 5 pods
  • clove                 -                 3
  • cinnamon          -                1 inch
  • fennel seeds      -                1 teaspoon
  • tomato              -                3 large


METHOD
  1. Boil the eggs separately, peel and cut them into halves and keep aside.
  2. Heat the oil in a pan and splutter cumin seeds.Add the bayleaf.
  3. Fry the chopped onions till golden brown.
  4. grind all the items mentioned in 'to grind' from the above except the tomatoes.
  5. Add the ground masala to the onions and saute till raw smell leaves.
  6. Add the turmeric,chilli and coriander powder
  7. puree the tomatoes.
  8. Add the puree to the onion masala mixture.
  9. saute till oil leaves to the sides.
  10. Add the water and salt.
  11. let the gravy boil and let it to thicken slightly.
  12. now add the eggs .
  13. mix carefully as not to separate the yolks from their halves.
  14. close the lid and let it cook for 5mins.
  15. mix gently twice or thrice in between.
  16. Sprinkle crushed kasuri methi on top.
  17. Serve with roti,rice,phulka,etc.


Wednesday, 4 November 2015

CHETTINAD MUTTON KEEMA CURRY

                                   CHETTINAD   MUTTON KEEMA CURRY


                                I was a big hater of mutton untill i was introduced to this keema (minced mutton meat)..it usually becomes very soft when cooked unlike the big mutton pieces..mostly it is given as boneless but u can find few bones here and there..So when giving to kids , make sure u check it for small pieces of  bones..this chettinad keema is a twisted version of my mom's keema curry..(I will make a different post on  my mom's recipe which will be very very simple and easy to make).
THis keema curry of my version can be fried till it becomes dry or it can be used as a gravy..


INGREDIENTS:
for the masala:
  • ginger                                    -                        half an inch piece
  • garlic                                     -                        5 pods
  • jeera                                      -                        1 teaspoon
  • fennel seeds                          -                        1 teaspoon
  • whole pepper                        -                         2 teaspoons
  • curry leaves                          -                         few
  • poppy seeds                         -                         2 teaspoons
  • cloves                                   -                        3 nos
  • cinnamon                             -                         1 inch piece
  • cardamom                            -                         2 nos
  • Bay leaf.                                -   1
dry roast  all the spices separately and grind to a paste

Other ingredients
  • mutton keema(minced mutton)                       -              500gms          
  • onions                                                              -              5 large chopped finely
  • red chilli powder                                             -              2 teaspoons
  • turmeric powder                                              -              half teaspoon
  • salt                                                                   -              to taste
  • oil                                                                    -              4 tablespoons
  • water                                                               -               1 cup


METHOD
  1. Wash the minced meat nicely and keep aside
  2. dry roast all the masala ingredients separately and grind to a fine paste.
  3. heat oil in a pressure cooker and fry chopped onions till golden brown
  4. add the ground masala paste and saute till raw smell goes.
  5. add the turmeric and chilli powders and saute for a minute.
  6. add the minced meat and required salt.(Always add minimal salt because finally the gravy will be thickened.Adding salt according to the present water content will leave u with a saltier gravy when it reduces..so beware at this stage)
  7. add water and close the lid.(meat should be just immersed in water.do not get tempted to add more water as the meat also leaves some liquid when cooked)
  8. Leave the flame on till 10 to 12 whistles (for me i left for 11 whistles.u can keep according to your meat)
  9. when the pressure leaves , open the lid .
  10. transfer the entire meat gravy into a iron kadaai or pan.
  11. FRy till the gravy thickens.
  12. you can fry further for a dry version of the same.
This can be served with rice, rotis , phulkas or even tastes yum with bread.Enjoy


Monday, 2 November 2015

TOMATO THOKKU

TOMATO THOKKU (for rice)


        This tomato thokku holds a special place in my kitchen as it is loved by all my family members,especially my husband..He goes gaga over it..believe me..u can have it with watever u like ..especially for rice, rotis,dosas and idlies ..this version of tomato thokku tastes good with rice. 


INGREDIENTS
  • Tomatoes                            -                      6 large (finely chopped)
  • Onions                                -                      4 large (finely chopped)
  • green chillies                     -                       2 slit
  • garlic                                 -                       6 pods
  • mustard seeds                   -                       one tablespoon
  • turmeric powder               -                       1/4th teaspoon
  • chilli powder                    -                       1 teaspoon
  • curry leaves                      -                       few
  • coriander leaves               -                       to garnish
  • salt                                   -                        to taste
  • oil                                    -                        2 tablespoons

 METHOD:
  
1.Heat oil in a pan.and splutter mustard seeds
2.Then add the curry leaves and saute for few secs.
3.Add together onions ,green chillies and garlic.Saute till the onions turns golden brown.
4.Add the tomatoes and saute till it turns mushy .
5.Add turmeric and chilli powder.Close the lid for 3-4 minutes for the tomatoes to cook nicely.
6.Open the lid and Saute till the oil leaves to the sides.
7.Garnish with coriander leaves.
8.Mix the thokku with rice and enjoy.